
Your Hockey Gear Is Foul. Clean It, Or Else.

Jolie Kerr is a cleaning expert and advice columnist. She'll be here every other week helping to answer your filthiest questions. Are you dirty? Email her.
I play hockey and live in a somewhat small apartment, meaning I've got to sacrifice a closet to store my gear. Now, hockey equipment stinks. A lot. I can't really be trying to clean it every other week, since it takes such a long time to dry, so do you have tips on how do I keep my hockey gear from becoming an odour monster? I'm currently using a mix of rubbing alcohol (like ⅔) and water (like ⅓) in a spray bottle, and just spray that shit after a game.
It is absolutely not normal how excited I was to receive this question. I mean, it's not really normal how excited I am about this job, but by now you all have gotten more or less used to that.
Anyway! I was excited because hockey-equipment cleaning is a topic that I've been champing at the bit to take on, but the questions I get on the subject are generally delivered to me anecdotally, rather than as formal, emailed queries, and I am pretty sticklerishy about not making up questions just because I want to answer them. So I've been sitting and waiting and drumming my fingers on the bar where I do my best work, and then along came Sully with his rank hockey gear and, lo, the Clean Person was happy. (His name isn't really Sully, but I don't publish names along with your questions and Sully is my go-to Generic Sports Bro name because Boston.)
It's a great topic, hockey gear, because oh God for those of us who grew up playing hockey or were hockey-adjacent (I'm the latter) THAT SMELL is the stuff of legends.
I can picture those of you who actually play the game now, beating your chest and bellowing: "THAT SMELL is part of hockey! THAT SMELL makes me awesome! What kind of Ugg-wearing Tom Brady-wannabe dandy-boy washes his pads? WHO ARE YOU, WOMAN, AND WHY THE FUCK ARE YOU ON DEADSPIN??" (Your words, not mine.) So look, I absolutely get it; I grew up in a hockey culture and understand the importance of ritual and customs and smells. And I also understand that, for many of you, the argument that you shouldn't carry around your fetid gear while it's awaiting Superfund classification probably won't cut it.
Which is why I come bearing an even better reason for you to wash your pads. But first, we need to talk about the source of THAT SMELL.
You all are pretty smart fellers, so I won't spend too much time going over what you likely already know on your own: When you play, you perspire, and that sweat gets into your pads. Eh, OK. But then those sweat-soaked pads go into a hockey bag and the real fun gets going. Because once those pads are packed into that bag, all wet and sweaty and feeling sexy and mingling with one another, bacteria come out to party like drunken permatanned girls on the Jersey Shore in August. Because bacteria love the dark, and they love moisture, and they love heat. So when you take that bag, which is already dark, and also moist because of your sweaty pads, and you toss it in your car or bring it in the house, you introduce heat to the equation and BOOM! Happy, slutty bacteria wearing sky-high heels and Bump-Its get all grindin' up on your stuff.
Some of you are probably all: "Heh. Shows what she knows. I leave my gear bag in the garage. In Minnesota. In February."
The thing is about that bacteria—they aren't picky. That bacteria may want Pauly D. with all his dark, hot, moisture, but they'll settle for the cut-rate version (I've named him Sauly E.), even though he lacks heat.
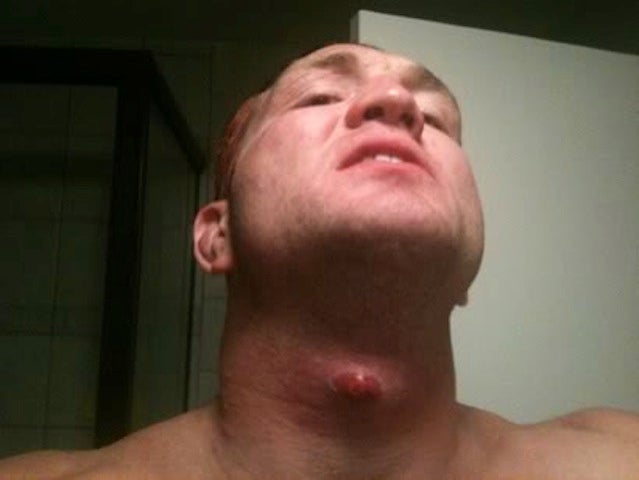
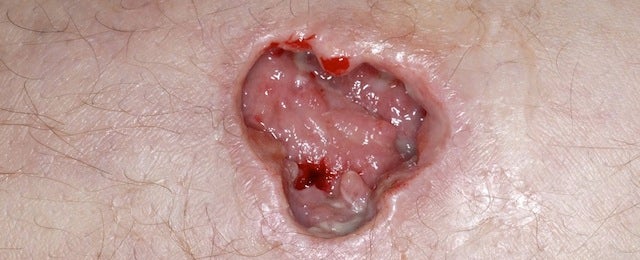
The other thing about that bacteria is that you don't want that stuff coming into contact with any cuts, bruises, or abrasions. Because that's how you wind up with a staph infection.
Do you know what a staph infection looks like? It looks like—and consider yourself warned— this.
And this.
And also like this
Right then! I think we can all agree that staph infections are not things that any of us want. So now that I've gone all American Horror Story on you, let's get down to brass tacks and talk about cleaning those pads.
What will follow will be A LOT of information. It will not be all of the information! Because that would be insane and also not super helpful. So what we'll go through today are a combination of best practices, shortcuts, and popular wisdom. Where it's appropriate, I'll offer you pros and cons of the various approaches; you should take those into account but ultimately make the decision in re cleaning your gear that makes the most sense for you in terms of time, money, ease, access and … you know … chest beating.
Drying Options
It's slightly odd to begin this discussion with a review of drying options, but bear with me: if you do nothing else at all with your pads, cleaning-wise, promise me that you'll dry them out after use. Thorough drying will cut way, way back on the amount of bacteria growth on the pads, which in turn will render the pads less staph infectious. It's also going to make a major difference in the development of THAT SMELL. To follow are a number of suggestions and best practices related to getting those pads dry. If you're unwilling to employ any of them, at the very, very least take the wet pads out of the bag and lay them out on the floor until they're dry and less fester-y. If you've got a secure outdoor area, even better—let 'em air out. If the ground isn't paved, throw a tarp or some garbage bags down on which to lay the gear.
Racks: If you've got the space for it, a drying rack large enough to hang all your pads will be well worth the investment. If you're feeling flush there is this very nice Wet Gear Hockey Equipment Drying Rack that will run you $70, though there are bunch of lower priced options out there, too, that will work just fine. If you're the handy type you could certainly build a drying rack for much less than that using PVC.
Hey! Have you rigged up your own gear rack? Please show it to us in the comments with any builder's instructions you feel like sharing with the class.
Dehumidifiers & fans: This is where the fun really begins! Introducing a fan and/or dehumidifier (preferably "and") to the space where you stash the pads will get them dry so much faster. Point the fan at the pads and let 'er rip; the humidifier can be placed on the floor near where the pads will be. Those two items are not terribly expensive, which makes this suggestion even nicer to offer.
Dryer bags: This Shock Doctor dryer bag is frustratingly out of production, but is interesting enough to make mention of, and to ask if anyone knows of similar products they can suggest.
Equipment dryers: If you've got $120 you want to throw at the problem, the Rocket Sport Dryer is a thing that exists.
Wet vacs: This is kind of a wild card—remember when I said I wasn't going to go through all the options? That's because there are all manner of homespun methods out there and we would be here all day if we were to review them all. But this one … this one was curious enough to bear mentioning, and also I want to hear what you all think about it as a drying method. I'm a little torn: On the one hand, it seems blessedly dumb easy! On the other hand, I worry that it might not be that good for the pads in that the force of the suctioning might compromise the fabric and/or stitching? I dunno. Sometimes I ask you questions, and this is one of those times. So, what say you?
Deodorizing Options
Our Letter Writer mentioned that he was using an isopropyl alcohol solution that he mixed in a spray bottle and used to spritz his pads down after use, which is a good thing to do. It's not the best thing to do, but it is a good one. We're going to run through a few options when it comes to spray-on deodorizers, but it's important to note that these sprays won't do very much if you don't use them in concert with a thorough drying regimen. The best approach is to lay your pads out, either on the ground or on a rack, then spray spray spray spray spray, then flip the switch on your fan/dehumidifier, then go drink a beer and watch Beaches.
There are definitely many more spray-on odor-eliminating options out there, but for our purposes we'll talk about six of the most commonly used ones, in order of best to worst.
White vinegar: Cheap? Check. Kills bacteria? Check. Neutralizes odor? Check. Safe on stitching/leather? Check. Safe on your skin? Check.
Vodka: Cheap? Check-ish. It's certainly more expensive—even the cheap, cheap stuff, which is what you should use—than is white vinegar. Kills bacteria? Check. Neutralizes odor? Check. Safe on stitching/leather? Check. Safe on your skin? Check.
Clorox Green Works Wipes: Cheap? Check minus. Kills bacteria? Check. Neutralizes odor? Check. Safe on stitching/leather? Check. Safe on your skin? Check.
Isopropyl alcohol: Cheap? Check. Kills bacteria? Check. Neutralizes odor? Check. Safe on stitching/leather? Check minus. Rubbing alcohol can cause the leather to dry out and crack. Safe on your skin? Check.
Febreze: Cheap? Check minus. Kills bacteria? Check, but only if you use the antimicrobial version of the product. Neutralizes odor? Check minus. Febreze is more of an odor masker than an odor eliminator. Safe on stitching/leather? Check. Safe on your skin? Check.
Lysol: Cheap? Check minus. Kills bacteria? Check plus. Neutralizes odor? Check. Safe on stitching/leather? Check minus. Safe on your skin? Check minus. The biggest drawback Lysol has is that it can cause skin irritation, though if the pads are allowed time to dry completely the chance of the Lysol causing irritation will be lessened. Lysol really shines when it comes to using it in rank-smelling hockey bags.
Washing Options
How often, and by what method, you wash your gear is largely a matter of choice; some people choose to wash their gear every few wearings, while others wait until the pads and such become unbearably foul-smelling. Regular washing is naturally the recommended frequency, but if you keep your gear dried and deodorized between wearings you can probably get away with washing your pads every month or two. Once a season if you're nasty. (That was a Janet Jackson reference, not an indictment of your personal choices.)
Everything except your skates and helmet can be washed, either by hand or in the machine. Pads and gloves should always be air dried, but your jersey, neck guard, socks, etc., can all be machine dried using the low heat cycle.
In terms of what products to use a mild detergent combined with OxiClean, Borax, white vinegar or a color safe bleach is ideal.
Hand washing vs. machine washing: Both hand washing and machine washing are great options when it comes to giving your gear a deeper cleaning than just spritzing them. Hand washing will, of course, be the gentler option; machine washing will be easier. If you've got a top-loading washer, which are the ones with the center agitator, you should plan to do the pads in two loads so that you can introduce towels to the cycle, which will serve as a buffer to help protect the pads from the agitator, which can cause damage. Or you can opt for hand washing.
Your hand-washing instructions look like this:
1. Fill the bathtub with very hot water, ¼ cup of laundry detergent and ½ cup of whichever booster you choose (Oxi, vinegar, color safe bleach or Borax).
2. Put the pads in the tub and hold them under the water until they stop breathing are saturated with the detergent solution. Now swirl and swoosh them around a bit—this agitation will help to release some of the buildup on the pads. Then just let 'em soak for 30 to 60 minutes. Longer if you'd like.
3. Now rinse the pads. So: drain the tub and turn on the running water. Hold each pad under the tap and sort of smoosh out as much of the suds as you can using your hands.
4. Once the pads have been rinsed well, roll each one up in a towel, which will help to extrude some of the water, and then hang them to dry.
And your machine-washing instructions look like this:
1. Use the gentle cycle and the hot water setting.
2. Add your mild detergent and whichever booster you're using.
3. Securely fasten any velcro, buttons, laces, etc., to prevent fraying.
4. If your machine allows for it, stop the cycle after the tub has filled with the water and detergent, and allow the gear to soak for 10 to 15 minutes.
Since I mentioned at the beginning of our washing instructions that skates and helmets can't be machine washed, here are a few tips for keeping them odor-free. Your skates can be stuffed with newspaper after use, which will absorb a lot of moisture and cut back on odor development. When an odor does occur, use an odor-eliminating shoe spray or get a set of sneaker balls to pop into the skates. Removing the liners and allowing them to air dry, or giving them a quick hand washing, will also help greatly when it comes to keeping your skates stink-free.
Helmets can be washed with a sponge and a small amount of mild detergent or shampoo. The trick to this is to make a bowl of water and shampoo, dip the sponge into that solution, wring it out very well, and wash the helmet with the suds that process creates, rather than with a lot of water. Once the helmet has been washed, repeat that process with clean water. Dry it off as best you can using a towel and then allow to air dry completely.
Hockey Gear Cleaning Services
Maybe you've gotten all this way and are just like, "You know what, lady? I'm tired. This all sounds exhausting. If you need me I'll be on the couch, drinking a beer and watching Beaches." And I'd be all, "AGREED. Also, move over and quit hogging the blanket." Then I'd tell you about professional cleaning services to which you can outsource the de-funking of your gear. I'd also pass you the tissues without comment, because I am a kind and gentle soul.
Since this is a fairly vast world in which we live, the best thing to do is to Google "hockey equipment cleaning services [name of your place of residence]" and see what comes up. Or ask the folks you play with if they have a service they're happy with. Speaking of those folks: Most services offer group discounts, so if you can coordinate it, you and your teammates should try to take advantage of that.
As a reward for making it all the way through the book I've just written for you, I'm sharing this episode of Cool School, a podcast hosted by Tyler Coates and Mikala Bierma, on which I was recently a guest. Among other things, we chatted about this very weird job I do, bed making, my cleaning schedule, and oobleck. There's also a rousing discussion of staph infections and my enthusiasm for the subject at about the 28-minute mark. Enjoy! Subscribe on iTunes! Make note of the times my Boston accent reahs its ugly head!
The Squalor Archive: Armpit Stain Eradication | Blood Stain Removal | Booze Stench Elimination | Brightening White Towels & Sheets | Cleaning Car Consoles | Caring for Athletic Clothing | Cat Pee | Dirty Ball Caps | Dog Mess on Carpet | Filthy Couches | Football Glove Care | Gasoline on Clothing | Grain Moth Infestations | Grease/Rubber Stain Treatments | Gross Computers | Guests & Bedbugs | Halloween Cleanup | Karategi Cleaning | Ketchup Stains | Laundering Bathmats | Lube Stains | Makeup Debris in Bathrooms | Makeup Stains On Upholstery | Marijuana Stench | Mayo Stains | Melted Microfiber on Enameled Cast Iron | Menstrual Cup Care | Mildewed Towels | Moldy Trousers | Mustard Stains | Nail Polish Stains | Odor Removal for Non-Launderable Items | Oven Cleaning | Pee-Smelling Bathrooms | Rank Roller Derby Pads | Rust Stains on Clothing | Scorched Pots | Scummy Glass Shower Doors | Semen Stains | Sheet Changing Cycles | Sheet Changing Etiquette & Tricks | Skidmarks | Stained Tennis Whites | Stinking Sinks | Stinky Feet | Stinky Slippers | Sunscreen Stains | That Orange Stuff In The Shower | The Great Bra Washing Extravaganza | Toilet Mold | Towel Laundering Cycles | Treating Testicular Odor | Washing & De-Pilling Sweaters | Wax Removal Techniques | When Butter Attacks | Yellowed Fingernails | Yellowed Sheets | Yellowed Swimsuits
Jolie Kerr is the author of the upcoming book My Boyfriend Barfed In My Handbag … And Other Things You Can't Ask Martha (Plume, February 25, 2014); more cleaning-obsessed natterings can be found on Twitter, Kinja, and Tumblr. Squalor appears on Jezebel and Deadspin on alternating weeks.
Related

Why the WNBA Won't Monetize Sophie Cunningham's Viral Point


What Prediction Markets Are Telling Us About NFL 2026 MVP

The Sacramento Kings Need to Blow It Up Before It's Too Late


Ben Askren Didn't Win the Match—But He Won the Weekend
- UFC Fight Night Best Betting Picks for Du Plessis vs. Usman in OKC
- France vs. England Best Bets: Three Picks for the World Cup Third-Place Match
- Dodgers vs. Yankees Friday July 17 Best Betting Picks and Props
- July 17 White Sox vs. Blue Jays Prediction, Odds and Best Bets
- Three MLB Futures Bets to Make After the All-Star Break
- Three Heisman Trophy Sleepers Worth Betting Before the 2026 Season
- England vs. Argentina Best Bets: Three Picks for the World Cup Semifinal
